Saturday, January 18, 2014

Winnie The Pooh Bento!

Hello Everyone!

Today's post is about Winnie the Pooh bento, since it is A.A. Milne's birthday!


I decided to try making pocket sandwiches today. I used 2 glasses of different sizes to make this pocket sandwich without a cutter, as I don't have one yet :( , using the great tips from the Bentolicious blog here.


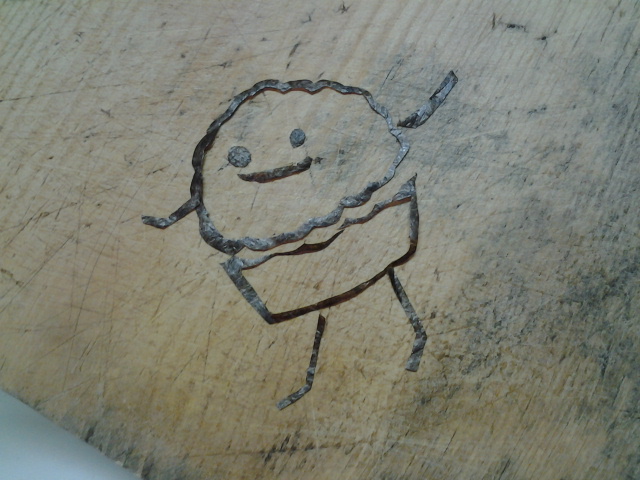
I decided it was going to be a sweet sandwich, so that the filling wouldn't spill, so I melted 3 Hershey's cookies and cream drops, mixed it with cream cheese and spread inside. I couldn't decide what to do with the sandwich, until I realized it should be a simple cartoon character, and for some reason Winnie the Pooh cam to mind. So I spread the top with butter, so it wouldn't conflict with the sweet taste, and cut out the nori face features based on a coloring page of Pooh I saw online (these are great because they are black and white, outlining exactly the features that must be made. For the ears, I cut them out of plantains, made incisions in the sandwich and stuck them in.


For the sides, I made plantain daisy flowers, a curvy checkerboard apple substituting the straight lines for wavy ones, parsley to fill the empty space, and 2 cherry tomatoes.


Lastly I reheated leftover penne pasta with corn, zucchini, celery and beef and topped it with melted cheddar cheese.

It was perfect timing too because Mamabelly is hosting an awesome Pooh link up at http://www.mamabelly.com/2014/01/winnie-pooh-bento-with-link-up.html. So check out her adorable lunch and some other really cute ones.

Tada and Happy Birthday to the late A. A. Milne! As always, thanks for reading!


Friday, January 17, 2014

Perfecting Bento Sides

Hello Everyone!

Today's post is no so much kyaraben (character bento) as it is trying to make the other tiers look pretty as well. If you've seen my earlier posts, I haven't really been focusing on the other tiers as much so I wanted to do that today.

I was going to have a dino cut sandwich but it was too hot when I cut it so the sandwich just went crack! :p So I learned you have to wait for a freshly grilled sandwich to cool before you cut it. I just freehand cubed this one so you couldn't see the split.


So here I have 2 cut slices of coconut macaron, two cherry tomatoes, 6 daisy cut plantains using my vegetable cutters and a checkerboard apple (based on Karenwee's awesome tutorial at http://kwbentodiary.blogspot.com/2012/10/checker-apple.html ). I rubbed it with lemon so it would not turn brown as I was making it the night before. I didn't cut away the apple but just used the whole thing. 


That's all folks and thanks for reading! :)


Thursday, January 16, 2014

Skitty Sandwich Bento!

Hello Everyone!

So now that the year is in full swing, I am keeping my bentos short and sweet so I can have a cute lunch but time to do everything else. (:

Today's post is about more pokemon bento - Skitty!! :D   Here is Skitty (image credit to http://pokemon.wikia.com/wiki/May's_Skitty)


I am a little obsessed with pokemon and wanted to make a series of pokemon faces transcribed onto squares of sandwiches. 


I first made my grilled cheese and tomato sandwich, and then cut into 4-6 squares. I cut the red portion of a fruit roll up in strips to put on the highest square only at the top. Then I cut the cheese into an oval and from that cut out a sort of crescent shape (mine did come out messier than I would have liked). For the eyes and mouth, I cut out 3 arcs from nori.

This was a pretty simple bento that took me about 15-20 mins. I would recommend using something red other than a sticky fruit roll up because it stuck to the lid when it was time to be eaten. :P

To complement the sandwich, I added a small bit of corn (used a knife to cut it from the cob), a small pastry from the french bakery, 3 pieces of mango, a lemon flavored Starburst candy, two strawberries, and 4 slices of delicious starfruit. The bowl tier is holding the rest of the sandwiches as the middle couldn't fit it all. And that's my pokemon Skitty figurine <3. 


Tada!


As always, thanks for reading and enjoy! :)


Sunday, January 12, 2014

ASDF Movie 7 Muffin Bento!

Hello Everyone!!

For the very first time, I have a real bento box!!! This is a 3 tier ninja girl bento box design by Kotobuki <3. It has a bowl as the 3rd tier, which is really nice to eat out of. The capacity is a bit small but I am learning to manage (: .


I made this for Monday's lunch for myself. I decided to do something simple since the tiers are small and I didn't have too much time. I did my nori cuttings and gathered the ingredients the night before, which took about 15-20 mins, and then 20 mins assembly in the morning. 

If you have never seen ASDF, it is a really funny/random youtube creation by TomSka. He has 7 3 minute animated videos, and this is based off of the adorable muffin in the 7th film. Luckily ASDF is black and white so it is pretty simple :) . 


I traced the outline onto wax paper based on a picture from Google Search. I used an X-Acto blade to start the inner cuts and continued with scissors. Here is the finished outline:


For the bento I placed him on a bed of rice (2nd tier), put broccoli, fish and a cantaloupe flower (3rd bowl tier), and canataloupe, orange AirHead, flower-cut kiwi and strawberries (1st tier). Tada! 


Thank you for reading and I hope you liked it!! :)


Wednesday, January 1, 2014

Mission Impossible (the first one) bento!!!!!!!!!!!!!

Hello Everyone!

Thank you so much for visiting my blog!

Today's post is a tribute to the first Mission: Impossible movie, from 1996. I made this sometime ago but forgot to post, so I'm sorry. I always forget how amazing this movie is. They make the old computers look so high-tech! Mission: Impossible is on of my favorite movie series. Lalo Schifrin is a genius! No to mention the amazing Tom Cruise. Did I tell you I love Mission: Impossible?  =D

This is the scene where we we are all on the edge of our seats as Ethan Hunt descends from the airduct to get the disk. I thought it would perfectly capture the movie since it is the most well-known scene of the film (and a famous movie scene in general).


I started out by making the blueprints and the wax paper outlines of the vault computer and Ethan Hunt himself. I drew the vault on white paper from looking at a picture, and traced that onto wax paper. I later traced this onto cheese, and cut off the edges of the outline to do the nori outlines. The other details were freehand.

The blue buttons are made out of an AirHead, and the button on top was yogurt on cheese. The seat is cocoa powder on cheese with butter.


Ethan Hunt was more complicated. To do him, I converted an image of the actual scene into a bare outline with the program InkScape, and then traced the outline onto cheese. I cut out each component separately and traced onto nori. Below is the Inkscape outline with Ethan Hunt cut out so I could trace onto noir and cheese. 


Finally, the M:i letters are the same blue AirHead, to tie in with my M:i - 4 bento. I am hoping to make this a food art series, and will be doing M:i-2 and M:i-3 sometime in the near distant future. The cable is simply a line cut from nori. 


As a personal review, this didn't come out the way I was hoping but I am posting it to keep it as part of fan foodart tribute to the Mission: Impossible series.

Thank you for reading!


Sunday, December 29, 2013

Pink Owl Bento

Hello Everyone!

Today's post is more food art than bento, as I wanted to eat dinner at a reasonable time last night. Originally this was going to be a bento honoring the 2003 film "The Last Samurai", starring the amazing Tom Cruise. I was going to do a sword and Japanese characters on the plate that said 'bushido', the code of honor Samurai had to follow (both to be made out of nori). Sadly I ran out of time, so I decided to go with a pink owl sitting on a Sakura branch.

Oh and by the way I have a brand new inventory for my bento tool kit! I got 10 food markers, 4 vegetable cutters and 4 cookie cutters (squirrel, heart, flower and star), so I was excited to use some of that in today's post. :)


From these, I used the Sakura flower vegetable cutter, 'Daisy' cutter (the one with so many petals) and my orange and pink markers.

Here is the owl food art!!


The actual sandwich is made with eggplant curry (Indian dish that we call "Bengan", meaning eggplant), mozzerella cheese, lettuce leaves and a dinner roll. 

I used the Sakura cutter to cut out the flowers from mozzerella cheese, and colored the tips with my pink food marker. A tip about working with these markers is that they use food coloring, so dont shake them or food coloring will spill everywhere, and if it does spill, clean it up right away or it will stain. I learned this the hard way as there are still some pink stains on the counter. :p  The flowers are colored sparsely because the pink marker didn't work so well with the cheese. 


To make the branch, I cut a strip from a Hershey's chocolate bar and placed it on the warm bread. I was too hungry/lazy to do the traditional Bain Marie melting method, where you place the chocolate in a pan on top of another pan with hot water and stir it. I lucked out because I didn't realize chocolate melted fast in small amounts and forgot the bread was warm :) . As it melted, I spread it out with a fork a little so it would look more natural and less rigid. 


For the owl, I used a pink Starburst (apparently is is supposed to be watermelon). Starburst is much lighter and less dense than AirHeads, and I used the rolling pin method again to get it flat. I drew the owl body onto wax paper, cut it out and put it over the candy to cut out. I put this in the fridge and took out my magenta AirHeads. 

This version is a special flavor, Zoomberry, for the promotion of the Disney movie Turbo. Normally, AirHeads does not come in a magenta color. I used the circle (smooth) side of the Daisy cutter on the AirHead. Then, I used the Daisy side to cut out the semicircle with frilly edges, so they could be wings. I also put these in the fridge and took out a square of nori to work with.

I put the remaining wax paper with the owl shaped hole over the nori and cut out the same owl. This was a tedious process as I was using an X-Acto blade, which rips nori if you aren't careful. Then I made a cut inside, and used scissors to complete the rest of the outline. Scissors work a lot better for nori than an X-Acto blade. 

I also cut out the inner eyes and feathers freehand using the scissors (I'm still gaining experience with nori and scissors - I see that the eyelashes came out way too thick).

The eyes, beak and feet were also freehand. Since I couldn't find something easy to use and orange, I went with the food marker and colored it.


Thank you for reading! :)